How To Move My Documents Folder To A Different Drive:
Does ‘My Documents’ sound like a contradiction in terms? In Vista, we impersonally call it Documents but do we really pay attention to this folder which is one of the most important ones in our system? Of course, it is not the only folder we have. But it usually is the default one called by the system when it needs to save something. And here lies its value as a time saver or its Achilles Heel – it depends on the way we manage it.
My Documents is the common folder which by default stores all our personal data i.e. our document files, music, movies, downloads and photos. Within it has the My Music, My Videos and a My Pictures folder to stash a particular file type. So it pays to deal with it like an important filing cabinet and not as a junk drawer.
Over time this folder becomes the ‘Big Daddy’ of all folders. Our personal data storehouse thus needs to be handled well and safeguarded from a digital disaster. It can be done by simply moving it to a safer backup location. In this article we are going to show you how to move the My Documents to a different drive.
There are two serious reasons to do this with immediate effect.
Imagine that all your precious documents, photos and sundry other files are organized beautifully in this folder on the system partition (commonly the C Drive). Imagine a system crash. Imagine the loss of never able to recover that data. And now imagine a simple step which could have saved the day.
The usual good word is to partition your hard disk into multiples with a minimum size kept for the system drive. With time My Documents will fatten up as more data is stashed away in it. Moving the folder to a different drive saves space and more importantly safeguards it.
How To Move My Documents Folder in Windows XP
- Right click on the My Documents icon on the desktop.
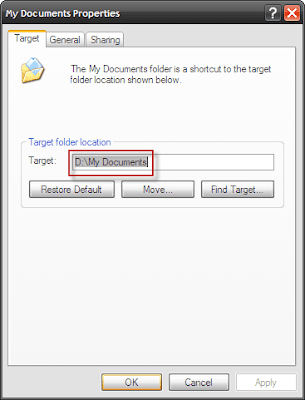
 2. Click on Move and choose your chosen location for the folder. Move it to a different partition. For instance, I have it on my D Drive.
3. Click Apply and then Ok. A prompt will ask whether you want to move all of the current documents to the new location or not. Choose Yes. All your documents are switched to the new location and it’s all like before except now they are safer from a system crash.
4. These are the elementary steps which will save you a ton of bother at a future date.
How To Move My Documents Folder in VistaThere is a slight change in Vista as the My Documents has given way to a Documents folder. The default location for this folder is C:\Users\[username]\Documents where [username] is your Windows Vista username and C Drive is the default installation drive. Vista creates Documents folder for each User profile on the computer and stores it in the appropriate profile folder. The process to change the location is relatively same,
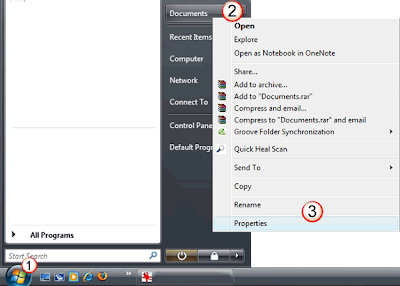
1. Click on the Start button.
2. Right-click on Document. For multiple users click your account name in the right-hand menu. Select Properties.
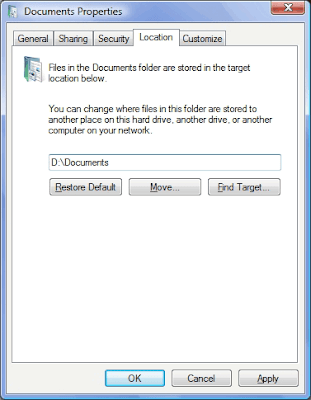
3. In the Properties dialog select the Location tab.
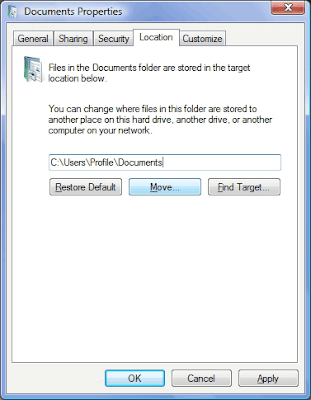
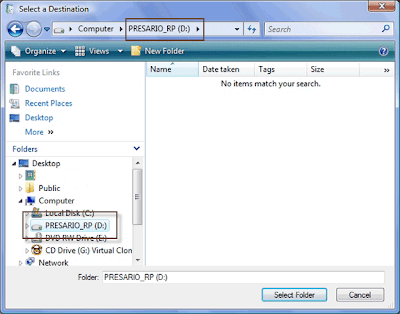
4. Next, click on Move. In the Destination dialog select the new location for your Documents folder. Click on Select Folder to return to the Properties dialog. The new location appears in the text box.
5. Click on Ok. Vista prompts you to confirm again and with a Yes click your task is done as the documents get shifted over to the new location.
The brief tutorial might be simplicity itself and experienced users might even scoff at it. But I have seen many neglect this fundamental step of data backup. And isn’t it true that the small things we take for granted are sometimes taken away from us. With few uncomplicated steps, at least it won’t be the documents in our My Documents folder.
Have there been times when you have found movinf My Document folder to a different drive a lifesaver? Or have overlooked it to your loss?

 How To Open Multiple ID in Google Talk


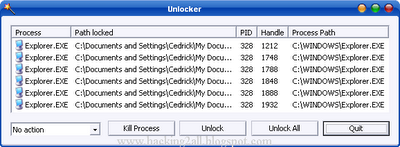 4. Simply click Unlock All and you are done!
